1. Nested Loops and Image Processing
Quick Overview of Day
Use nested loops to demonstrate how to do simple image processing, by iterating through each pixel in an image and making some changes.
CS20-CP1 Apply various problem-solving strategies to solve programming problems throughout Computer Science 20.
CS20-FP1 Utilize different data types, including integer, floating point, Boolean and string, to solve programming problems.
CS20-FP2 Investigate how control structures affect program flow.
CS20-FP3 Construct and utilize functions to create reusable pieces of code.
1.1. Image Processing Introduction
Note
Before starting this section, you will want to install the cs20-image package. To do this, open Thonny and select Tools → Manage packages…, then type in cs20-image and press Search. Once the package is selected, click install. You should now be able to use any image that you download with the example code shown below.
Be careful! You need to save the Python file and the image file in the same directory on your computer for this to work!
The following video (created by Code.org) describes how images are represented using binary digits, as well as an overview of how image filters work. It is a great introduction to the image filtering that follows.
Two dimensional tables have both rows and columns. You have probably seen many tables like this if you have used a spreadsheet program. Another object that is organized in rows and columns is a digital image. In this section we will explore how iteration allows us to manipulate these images.
A digital image is a finite collection of small, discrete picture elements called pixels. These pixels are organized in a two-dimensional grid. Each pixel represents the smallest amount of picture information that is available. Sometimes these pixels appear as small “dots”.
Each image (grid of pixels) has its own width and its own height. The width is the number of columns and the height is the number of rows. We can name the pixels in the grid by using the column number and row number. However, it is very important to remember that computer scientists like to start counting with 0! This means that if there are 20 rows, they will be named 0,1,2, and so on through 19. This will be very useful later when we iterate using range.
In the figure below, the pixel of interest is found at column c and row r.
1.2. The RGB Color Model
Each pixel of the image will represent a single color. The specific color depends on a formula that mixes various amounts of three basic colors: red, green, and blue. This technique for creating color is known as the RGB Color Model. The amount of each color, sometimes called the intensity of the color, allows us to have very fine control over the resulting color.
The minimum intensity value for a basic color is 0. For example if the red intensity is 0, then there is no red in the pixel. The maximum intensity is 255. This means that there are actually 256 different amounts of intensity for each basic color. Since there are three basic colors, that means that you can create 2563 distinct colors using the RGB Color Model.
Here are the red, green and blue intensities for some common colors. Note that “Black” is represented by a pixel having no basic color. On the other hand, “White” has maximum values for all three basic color components.
Color |
Red |
Green |
Blue |
|---|---|---|---|
Red |
255 |
0 |
0 |
Green |
0 |
255 |
0 |
Blue |
0 |
0 |
255 |
White |
255 |
255 |
255 |
Black |
0 |
0 |
0 |
Yellow |
255 |
255 |
0 |
Magenta |
255 |
0 |
255 |
Note
Search the web for a color picker. Experiment by selecting different colors, and pay attention to the different RGB values that are generated from each color you select.
1.3. Creating and Manipulating Pixels
In order to manipulate an image, we need to be able to access individual pixels. This capability is provided by
a module called image, provided in ActiveCode (or with the cs20-image package). The image module defines two classes: Image and Pixel.
Each Pixel object has three attributes: the red intensity, the green intensity, and the blue intensity. A pixel provides three methods (functions)
that allow us to ask for the intensity values. They are called get_red, get_green, and get_blue. In addition, we can ask a
pixel to change an intensity value using its set_red, set_green, and set_blue methods.
Method Name |
Example |
Explanation |
|---|---|---|
|
|
Create a new pixel with 20 red, 100 green, and 50 blue. |
|
|
Return the red component intensity. |
|
|
Return the green component intensity. |
|
|
Return the blue component intensity. |
|
|
Set the red component intensity to 100. |
|
|
Set the green component intensity to 45. |
|
|
Set the blue component intensity to 156. |
In the example below, we first create a pixel with 45 units of red, 76 units of green, and 200 units of blue. We then print the current amount of red, change the amount of red, and finally, set the amount of blue to be the same as the current amount of green.
1.3.1. Check Your Understanding
- Dark red
- Because all three values are close to 0, the color will be dark. But because the red value is higher than the other two, the color will appear red.
- Light red
- The closer the values are to 0, the darker the color will appear.
- Dark green
- The first value in RGB is the red value. The second is the green. This color has no green in it.
- Light green
- The first value in RGB is the red value. The second is the green. This color has no green in it.
image-processing-nested-loops3: If you have a pixel whose RGB value is (50, 0, 0), what color will this pixel appear to be?
1.4. Nested Iteration
Image processing refers to the ability to manipulate the individual pixels in a digital image. In order to process all of the pixels, we need to be able to systematically visit all of the rows and columns in the image. The best way to do this is to use nested iteration.
Nested iteration simply means that we will place one iteration construct inside of another. We will call these two iterations the outer iteration and the inner iteration. To see how this works, consider the iteration below.
for i in range(5):
    print(i)
We have seen this enough times to know that the value of i will be 0, then 1, then 2, and so on up to 4.
The print will be performed once for each pass.
However, the body of the loop can contain any statements, including another iteration (another for statement). For example,
The for i iteration is the outer iteration and the for j iteration is the inner iteration. Each pass through
the outer iteration will result in the complete processing of the inner iteration from beginning to end. This means that
the output from this nested iteration will show that for each value of i, all values of j will occur.
Note that the value of i stays the same while the value of j changes. The inner iteration, in effect, is moving “faster” than the outer iteration.
Another way to see this in more detail is to examine the behavior with codelens. Step through the iterations to see the
flow of control as it occurs with the nested iteration. Again, for every value of i, all of the values of j will occur. You can see that the inner iteration completes before going on to the next pass of the outer iteration.
Activity: CodeLens 1.4.2 (nested2)
Our goal with image processing is to visit each pixel. We will use an iteration to process each row. Within that iteration, we will use a nested iteration to process each column. The result is a nested iteration, similar to the one
seen above, where the outer for loop processes the rows, from 0 up to but not including the height of the image.
The inner for loop will process each column of a row, again from 0 up to but not including the width of the image.
The resulting code will look like the following. We are now free to do anything we wish to each pixel in the image.
width = 400
height = 300

for row in range(height):
    for col in range(width):
        # do something with the pixel at position (col, row)
1.5. Creating an Empty Image
It is possible to create an Image object that is “empty”. An EmptyImage has a width and a height. However, the pixel collection consists of only white pixels when it is created. We can create and draw an empty image like this:
After creating an empty image, we can change the color of a specific pixel by using the set_pixel function inside of a nested for loop.
1.5.1. Try This
Change the code above to draw an image of a different color.
Adapt the code above to draw a “pinstripe” image. In other words, change the code so that only every other row is colored red. Hint: recall the modulus % operator.
Can you make it work for every other column (instead of every other row)? How about every 5th row/column?
1.6. Image Objects
To create a non-empty Image object, we pass in the name of a file that stores a digital image. The resulting image object has an attribute corresponding to the width, the height, and the collection of pixels in the image.
We can ask an image object to return its size using the get_width and get_height methods. We can also get a pixel from a particular location in the image using get_pixel and change the pixel at
a particular location using set_pixel.
The Image class is shown below. Note that the first two entries show how to create image objects. The parameters are different depending on whether you are using an image file or creating an empty image.
Method Name |
Example |
Explanation |
|---|---|---|
|
|
Create an Image object from the file skflag.png. |
|
|
Create an Image object that has all white pixels |
|
|
Return the width of the image in pixels. |
|
|
Return the height of the image in pixels. |
|
|
Return the pixel at column 35, row 86. |
|
|
Set the pixel at column 100, row 50 to be mp (where mp is of the Pixel data type). |
Consider the image shown below. Assume that the image is stored in a file called skflag.png. Line 2 opens the
file and uses the contents to create an image object that is referred to by img. Once we have an image object,
we can use the methods described above to access information about the image or to get a specific pixel and check
on its basic color intensities.
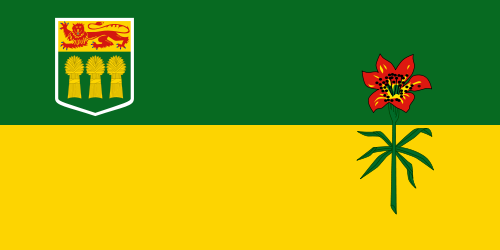
When you run the program you can see that the image has a width of 500 pixels and a height of 250 pixels. Also, the
pixel at column 45, row 55, has RGB values of 253, 212, and 1. Try a few other pixel locations by changing the get_pixel arguments and rerunning the program.
1.7. Image Processing with an Existing Image
1.7.1. Increasing a Color
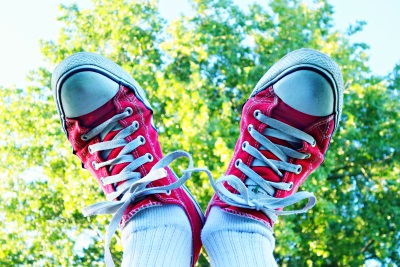
Let’s say that we wanted to increase the amount of green in the image shown above (sneakers.jpg). To do so, we would need to look at every individual pixel, determine how much green that pixel contained, and then increase it by some amount. Here is a simple program that does just that:
Caution
There is a chance that the following program will not finish execution before triggering a TimeLimitError in your web browser. To see the completed version of the image, you may either:
copy/paste this code into Thonny and execute it there (being sure to save the image file into the same folder as the Python code)
unindent (remove all spaces before) the call to
img.draw(canvas)(this will remove the animation, as the you only draw the completely transformed image, instead of the altered version after one completed loop)
Let’s take a closer look at the code. After importing the image module, we create an image object called img that represents a typical digital photo. We use the get_width() and get_height() functions to create a window that is the same size as the image.
Lines 8 and 9 create the nested iteration that we discussed earlier. This allows us to process each pixel in the image. Line 10 gets an individual pixel at the current location of the nested loop.
Lines 12-14 extract the original intensity from the pixel. For red and blue, the new values stay the same as the original value. For the green intensity, we simply add 50 to whatever green amount was there previously. Note that if you pass a value higher than 255 or lower than 0 when setting the intensity of a pixel, the image module will automatically set the value to the highest/lowest value allowed (255/0). Once we have the new_red, new_green, and new_blue values, we can create a new pixel (Line 15).
Finally, we need to replace the old pixel with the new, adjusted pixel in our image. It is important to put the new pixel into the same location as the original pixel that it came from in the digital photo.
1.7.2. Negative Images
One of the easiest image processing algorithms will create what is known as a negative image. A negative image simply means that each pixel will be the opposite of what it was originally. But what does opposite mean?
In the RGB color model, we can consider the opposite of the red component as the difference between the original red
and 255. For example, if the original red component was 50, then the opposite, or negative red value would be
255-50 or 205. In other words, pixels with a lot of red will have negatives with little red and pixels with little red will have negatives with a lot. We do the same for the blue and green as well.
The program below implements this algorithm using the previous image (skflag.png). Run it to see the resulting negative image. Note that there is a lot of processing taking place and this may take some time to complete (it will execute faster if you run it in Thonny). Also note that instead of using col and row as the variable names in the nested loop, x and y have been used. In your own programs, use whichever makes more sense to you!
Note
The cs20-image module allows you to do a few things that cannot be done on the website version, including the .save("filename.jpg") method shown in the last line of the code above.
1.7.3. Try This
Change the name of the file in the
image.Image()call to see how other images look as negatives. Here are two other images that you can use (fransaskoisflag.jpgandpineapples.jpg):
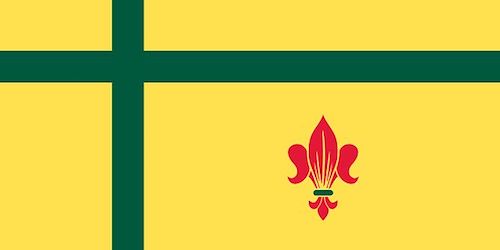
fransaskoisflag.jpg
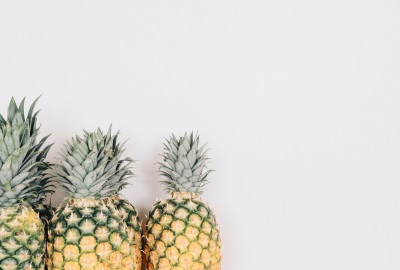
pineapples.jpg
Try to change the program above so that the outer loop iterates over the columns and the inner loop iterates over the rows. We still create a negative image, but you can see that the pixels update in a very different order.
Download an image from the internet. Save it in the same folder as the Python script you are executing, then change your script to create the negative of the image you downloaded.
1.7.4. Check Your Understanding
- Output a
- i will start with a value of 0 and then j will iterate from 0 to 1. Next, i will be 1 and j will iterate from 0 to 1. Finally, i will be 2 and j will iterate from 0 to 1.
- Output b
- The inner for-loop controls the second digit (j). The inner for-loop must complete before the outer for-loop advances.
- Output c
- The inner for-loop controls the second digit (j). Notice that the inner for-loop is over the list [0, 1].
- Output d
- The outer for-loop runs 3 times (0, 1, 2) and the inner for-loop runs twice for each time the outer for-loop runs, so this code prints exactly 6 lines.
image-processing-nested-loops11: What will the following nested for-loop print? (Note, if you are having trouble with this question, review CodeLens 3).
for i in range(3):
    for j in range(2):
        print(f"{i} {j}")
a.

0 0
0 1
1 0
1 1
2 0
2 1

b.

0   0
1   0
2   0
0   1
1   1
2   1

c.

0   0
0   1
0   2
1   0
1   1
1   2

d.

0   1
0   1
0   1
- It would look like a red-washed version of the bell image
- Because we are removing the green and the blue values, but keeping the variation of the red the same, you will get the same image, but it will look like it has been bathed in red.
- It would be a solid red rectangle the same size as the original image
- Because the red value varies from pixel to pixel, this will not look like a solid red rectangle. For it to look like a solid red rectangle each pixel would have to have exactly the same red value.
- It would look the same as the original image
- If you remove the blue and green values from the pixels, the image will look different, even though there does not appear to be any blue or green in the original image (remember that other colors are made of combinations of red, green and blue).
- It would look the same as the negative image in the example code
- Because we have changed the value of the pixels from what they were in the original ActiveCode box code, the image will not be the same.
image-processing-nested-loops12: What would the image produced from ActiveCode box 16 look like if you replaced the lines:
new_red = 255 - p.get_red()
new_green = 255 - p.get_green()
new_blue = 255 - p.get_blue()
with the lines:
new_red = p.get_red()
new_green = 0
new_blue = 0
1.7.5. Acknowledgments
Images are from Pexels, and are licensed as CC-0. Saskatchewan flag images are also licensed as CC-0, obtained from Wikimedia.