Step 0: Transitioning To Text
Quick Overview of Day
Explore the Reeborg environment, and the basic commands available to Reeborg. Introduce the steps the students will be following. Unlike the rest of the pages in this textbook, the steps that follow do not map easily to a single class period. Some early steps will take the students very little time, and some later steps will take them quite a long time. The intended use of these steps is to give the students approximately two weeks of class time to work on the steps at their own pace.
CS20-CP1 Apply various problem-solving strategies to solve programming problems throughout Computer Science 20.
If you’d prefer to watch a video introducing Reeborg, the following video demonstrates the same ideas as what I’ve described in text below.
Introduction
Although there is a lot you can learn using an environment like Scratch, we’d like to reinforce that what you have learned works using a more traditional programming language as well. In this course, the traditional programming language we will use is called Python. Instead of jumping straight into working with Python, however, we are going to continue our journey in exploring programming by using an environment called Reeborg. Using Reeborg, we will begin to type in Python commands, rather than simply dragging them into place as we did with Scratch. This lets you start to make syntax errors (in other words, if you type something the computer doesn’t understand, it will not work), but still gives you visual feedback about your programs.
Reeborg’s First Step
Open the Reeborg environment. If the Step 0 world does not open by default, select it in the world menu:

You should now see the robot, Reeborg, alone in an empty world. Unfortunately, Reeborg is a used robot, and so it is only capable of doing a few basic commands. One thing Reeborg can do is move forward, as follows:
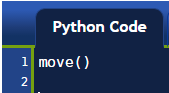
In the editor panel, there is a single instruction:
move()
move() is an example of a Python function.
A function has a name; in this case, it is move. Valid names must start with either a letter or the underscore character “_” and may contain letters, numbers or the underscore character “_”. The name of the function is followed by (). This tells Reeborg (Python) that the function must be executed or called (which are two synonyms). This function must be on a line of its own. [We will see exception to this rule later on.]
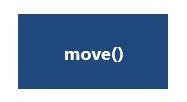
Occasionally we will make flowcharts which are graphical representations of a program. In a flowchart, a single instruction like move() might be represented
as follows:
and a complete program containing this single instruction would be represented as follows:
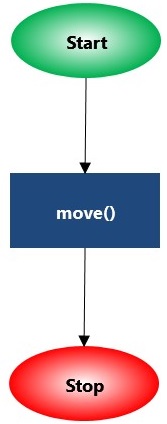
In a flowchart, the sequence of instructions follows the arrows, starting at “Start” and ending at “Stop”.
Try this!
Add a second move() instruction so that Reeborg takes two steps instead
of only one.
Hint
Each instruction must appear on its own line, with no extra space at the beginning of the line.
Dealing with eRRoRs
When writing computer programs, you will likely make many errors. To see how Reeborg reacts to some errors, I will ask you to intentionally introduce one error in the program.
Try this!
Change move() to Move() (with an uppercase M) and try to
execute the program.
Python, the language that Reeborg understands, is “case sensitive”; that is, lowercase letters have a different meanings than uppercase ones. Now that you see how Reeborg deals with errors, go back, fix the program and run the corrected version.
A special tool to help you
At the very top of Reeborg’s World, you will find a button titled Reeborg’s keyboard. If you click on it, a special keyboard will appear. By clicking on a each button, the corresponding instruction, Python keyword, etc., will be inserted in the editor automatically. This can be useful to ensure that names are spelled out correctly and that required parentheses are not forgotten.
Next steps
The following pages will provide you with challenges for you to complete. Although you could complete them in any order, the order they are presented will reveal the capabilities of Reeborg in a logical order. When you finish a step, it is a good idea to show your solution to your teacher to confirm you have created an appropriate solution to the problem. Although the worlds have been created to give you instant feedback, it can be really helpful to have an experienced human give you tips as well!
Acknowledgments
Reeborg is a modern adaptation of an environment called Karel the Robot, created by Richard Pattis at Stanford University in 1981. The version we will use was created by André Roberge. The tutorials you will be using are an adaptation of tutorials made by Roger Frank, Jeffrey Elkner, André Roberge and Dan Schellenberg.