12. The Time Module and Using a Micro:bit
Quick Overview of Day
Learn about the time module. Learn how to use a BBC Micro:bit to sense the physical world, and send output to the LED grid of the Micro:bit.
CS20-CP1 Apply various problem-solving strategies to solve programming problems throughout Computer Science 20.
CS20-FP1 Utilize different data types, including integer, floating point, Boolean and string, to solve programming problems.
CS20-FP2 Investigate how control structures affect program flow.
12.1. Time Module
Sometimes, we’d like to wait a bit before running the next command in a Python program. To do this, we can import time, then use the sleep() function. An example is below:
12.2. Micro:bit Setup
12.2.1. Installing a Driver If Using Legacy Windows OS
The following only applies to users of Windows that are on a version earlier than Windows 10. If you are using Windows 10, Mac, or Linux, you can skip this step.
If you are on a Windows machine (< Windows 10), you will need to download the mbed driver if you want to use your Micro:bit as an input/output device. Note that you will need to have a Micro:bit plugged into your machine when installing the driver, and that it requires admin rights. If you want to simply run code on your Micro:bit, and not communicate with your computer, no driver is required for any platform (but this does really limit the types of interesting things that can be done, and none of the examples in the textbook will work).
12.2.2. Micro:bit Modes
Your Micro:bit can be used in two modes:
running “flashed” code, independent of a computer (can run on batteries, or through power supplied via the computers USB port)
communicating through the serial port with your computer as an input/output device
For the purposes of this textbook, we will always be using the Micro:bit as an input/output device by communicating over a USB connection.
Note
If you want to learn more about how to use the Micro:bit without it being hooked up to a computer, you can find out about how to do that on the Microbit website. Using web based platforms, you can create code using a block based environment similar to Scratch, or an online Python environment. Note that these environments simply run your code on the Micro:bit, and do not send any signals back to the computer.
12.2.3. Flashing the Micro:bit
While your Micro:bit is connected to your computer via USB, it is possible to send instructions to the Micro:bit using serial commands. In order to do this, we first need to flash the Micro:bit with a micropython .hex file. This lets you use a BBC Micro:bit in Python to sense the physical world around you, and to output to LEDs (and much more, if you hook up additional sensors). You should only have to do this once, unless you flash the Micro:bit with a different .hex file in order to use it without being tethered to a computer.
To flash your Micro:bit, first connect your Micro:bit to your computer via USB. Now download the bitio.hex file to your computer. Drag the .hex file onto your Micro:bit in the Windows Explorer (or Mac Finder), as shown below.
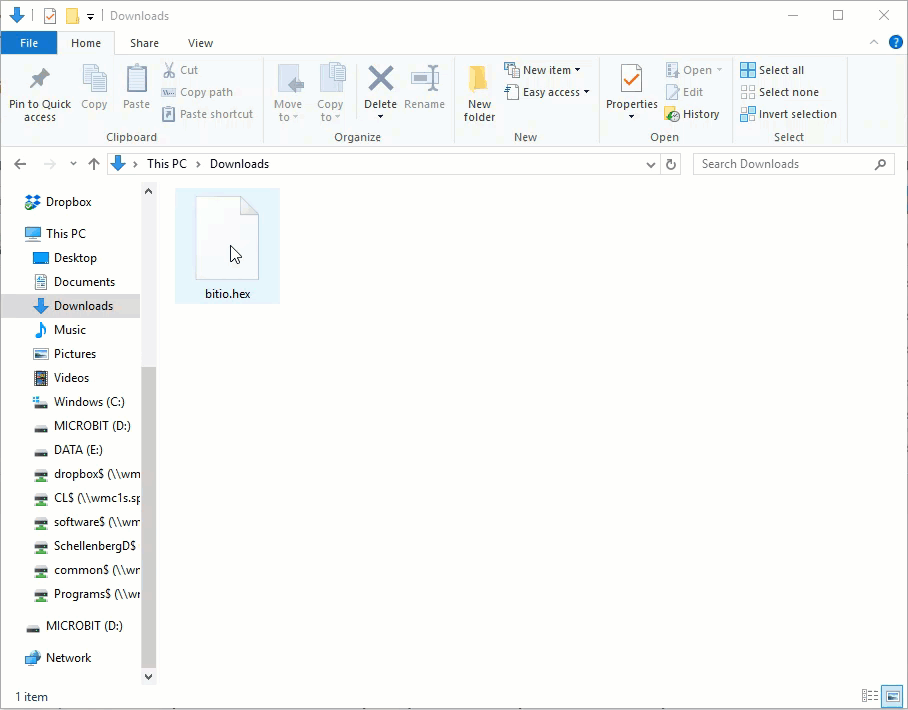
You should now see an I/O image on the LED grid of the Micro:bit, which tells you that your Micro:bit is ready to communicate with Python (though you still need to install a module in Thonny, as described below).
Note
The bitio.hex file is from the bitio package written by David Whale. This is the package we are about to install to communicate with the Micro:bit. Since the bitio package is not published on PIP, I (Dan Schellenberg) simply packaged it in a format that makes it easy to install via Thonny. Even though it is called cs20-microbitio, it is really just the bitio package.
12.2.4. Installing the Micro:bit Module in Thonny
In order to communicate with the microbit in Python, you need to install the cs20-microbitio package in Thonny. To do that, go to Tools → Manage packages…, type in cs20-microbitio into the search bar, and install. You only need to do this once, after which you should be able to use import microbit whenever you want to interact with the Micro:bit in Python.
12.3. Using the Micro:bit
Once you have done that, try running the code below:
import microbit

microbit.display.scroll("Hey there, CS20")
When you press Run, there will be a prompt in the console telling you to disconnect the Micro:bit, then press ENTER. Follow the prompts, which allow the bitio module to detect which device connected to your computer is the Micro:bit. The console will look something like this:
No micro:bit has previously been detectedScanning for serial portsremove device, then press ENTERscanning…found 132 device(s)plug in device, then press ENTERscanning…found 133 device(s)found 1 new deviceselected:/dev/tty.usbmodem1422Do you want this device to be remembered? (Y/N)Yconnecting…Your micro:bit has been detectedNow running your program
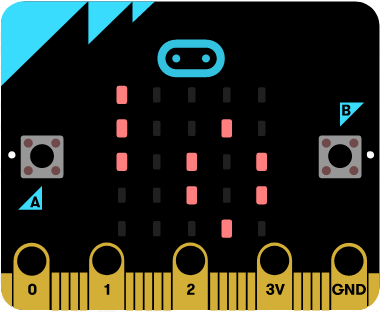
Once the connection is established, you should see the message scroll across the 5x5 LED grid on your Micro:bit.
12.4. Displaying Single Characters
If we wanted to display the letters from the word “SASK” one at a time, there are a number of different ways we could do it. Our first thought might be to do something like this:
import microbit

microbit.display.show("S")
microbit.display.show("A")
microbit.display.show("S")
microbit.display.show("K")
Although this technically works, when you run this code, you will notice that the letters flash on the LED grid very quickly. To slow this down a bit, we can use the time module we experimented with above. Consider the following version:
import microbit
import time

microbit.display.show("S")
time.sleep(0.5)
microbit.display.show("A")
time.sleep(0.5)
microbit.display.show("S")
time.sleep(0.5)
microbit.display.show("K")
This works much better! We can now see each letter appear on the screen then pause for half a second before the next letter appears. However, you will notice that we are essentially repeating the same instruction four times in a row. We can improve the code using a for loop to perform the repetition, as follows:
import microbit
import time

for letter in ["S", "A", "S", "K"]:
    microbit.display.show(letter)
    time.sleep(0.5)
12.5. Drawing with a Turtle
The examples above used the Micro:bit as an output device, as we sent instructions telling the Micro:bit to change what the LED grid was displaying. We can also use the Micro:bit as an input device. One of the built in ways of taking input from the Micro:bit is the accelerometer. An accelerometer allows us to detect the orientation of the device (in other words, whether it is tilted in the x, y or z axis). The following example checks the x axis to detect whether the device has been tilted left or right. To help you understand the values that are sent back to Python, I have printed out the value of x (note that in order to concatenate the x value, I had to convert it’s data type to a string).
import microbit
import time

while True:
    x = microbit.accelerometer.get_x()
    if x > 200 or x < -200:
        print(f"Tilted: {x}")
    else:
        print("Not Tilted")
    time.sleep(0.5)
To use the accelerometer data from the Micro:bit to control a turtle, we can adapt the program as follows:
import microbit
import time
import turtle

window = turtle.Screen()
tim = turtle.Turtle()

while True:
    x = microbit.accelerometer.get_x()
    if x > 200:
        print("Right")
        tim.forward(5)
    elif x < -200:
        print("Left")
        tim.backward(5)
    else:
        print("Not Tilted")
    time.sleep(0.1)
12.6. Practice Problems
12.6.1. Better Turtle Controller
Adapt the program shown above to make your turtle:
turn left or right based on tilting the x axis
move forward or backward based on tilting the y axis
12.6.2. Drawing Different Shapes
Create a program that uses the turtle module to draw a square when you press the “A” button, and a triangle when you press the “B” button. You will need look at the Micro:bit Reference in the appendix to figure out how to detect a button being pressed.
12.7. Going Further
Look at the Micro:bit Reference in the appendix, and run some of the demonstration code found there to get a sense of what the Micro:bit can do.